This article is meant for instructors. If you are looking for information on how to use Panopto as a student, please refer to out Student Panopto Knowledge Base.
Follow these instructions to automatically enroll for a GVSU Panopto account and start recording video.
-
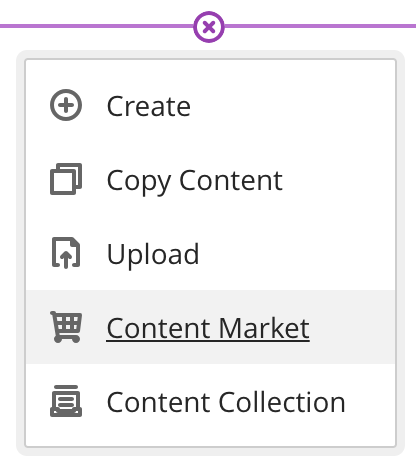
To add a Panopto video, first click on the plus sign where you want to add it, then select ‘Content Market’
-
Scroll down the page and click ‘Panopto Embed’

NOTE: This option is what triggers the provisioning process for your account for use with Panopto. This can take several minutes.
-
From here you have three options
-
Choose: select a video that already exists in your Panopto folders (See the handout ‘Using Panopto Web Capture’ for more information on this option)
-
Upload: Upload a pre-recorded video to convert into a Panopto-formatted video
-
Record: Record a new video using Capture (Browser)
Upload a Video
-
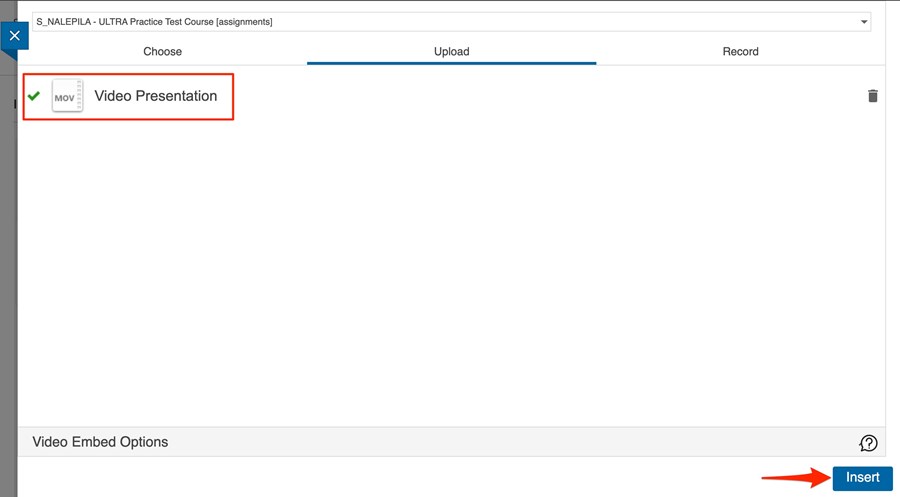
To upload a pre-recorded video, select the Upload tab.
-
You can drag and drop video files directly into the Upload window tab.
-
Or, if you click on "Choose video or audio files" you can browse through your device's saved files and upload the video that way.
-
Once the video has been successfully processed, a green checkmark will appear next to the title of your file. When processing has finished for the file(s), click on Insert.
Record a Video
-
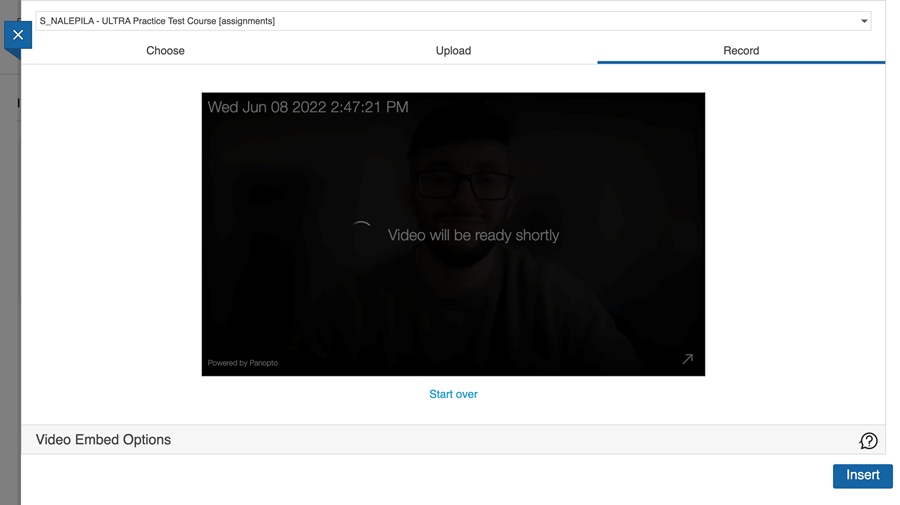
To record a new video, select the Record tab.
-
Give your recording a name and select the Capture (Browser) option.
-
Press the Launch Capture button to be redirected to the Panopto Web Recorder screen.
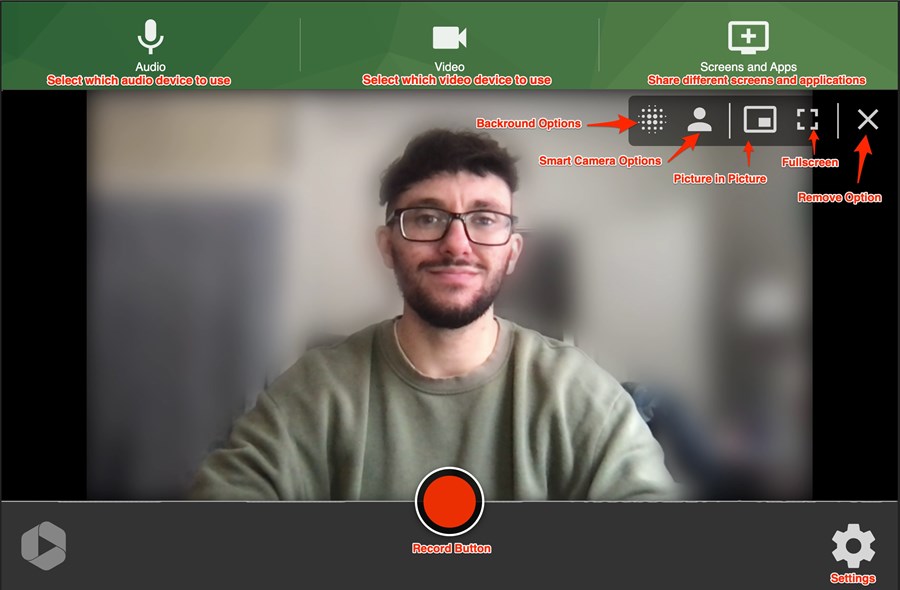
The above image is what you will see when you enter the Panopto Web Recorder screen. The options at the top of the screen are for selecting audio, video, or screen sharing options respectively. Notice the record button below your camera display. You can see if the recorder is picking up your audio by watching the horizontal line that goes behind the record button bounce as it detects audio inputs.
-
If you need to share a presentation or other application, click on the Screen and Apps button to pull up the sharing options window.
-
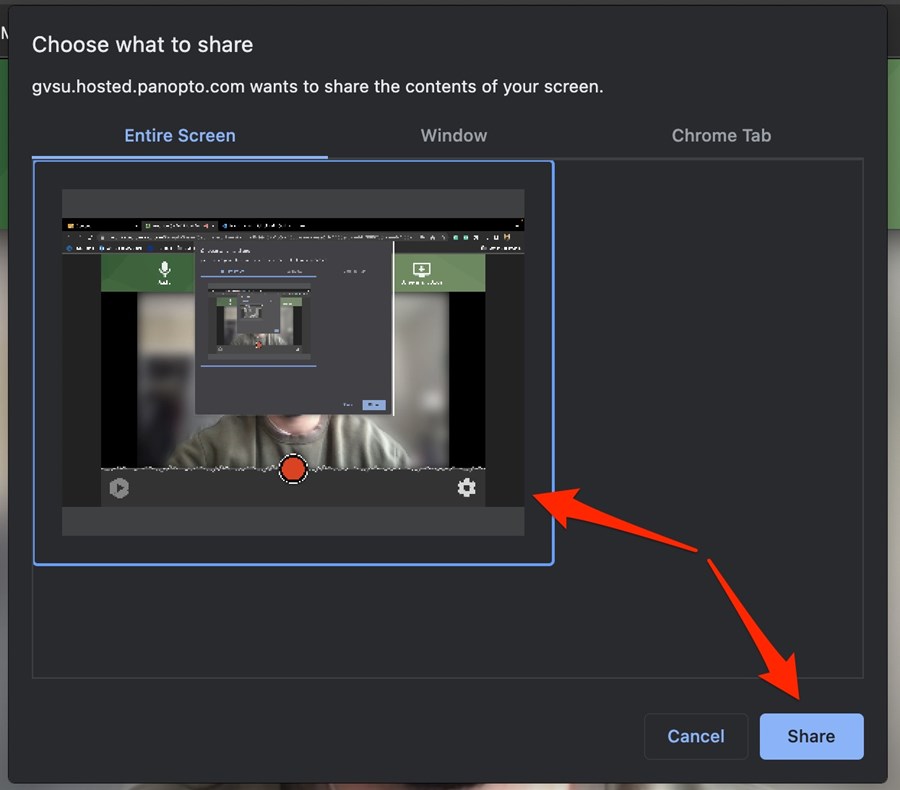
Sharing options window will look like this:
-
Select your Entire Screen and click Share
-
When ready, click on the record button to start the 5-second countdown. The recording will start after 5 seconds.
-
When you are finished recording, navigate back to your Panopto window and click on the Stop/Record button. You will be redirected to a new uploading page where the video will automatically begin uploading to the automatically generated course folder. You can also rename the video from this window.

-
Processing usually only takes a few minutes, but can up to 24 hours depending on the length of the video and server usage.
-
When the video is done processing, you will have access to the ‘Edit’ and ‘Share’ buttons. Clicking these will redirect you to the Panopto editor or viewer. Learn more about editing Panopto videos in our ‘Editing a Panopto Video’ handout.
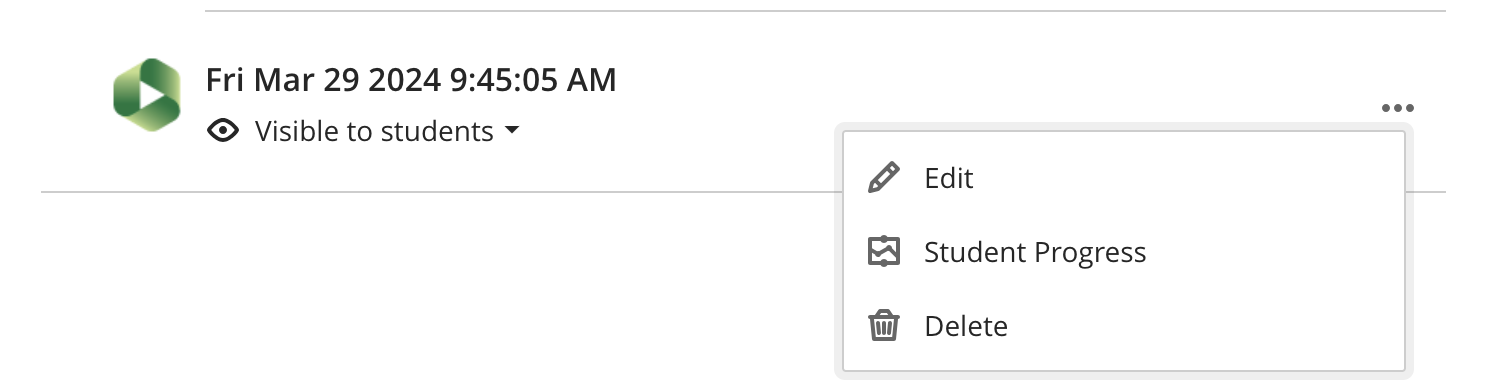
Your video has now been embedded in your Blackboard course! You can edit the name displayed in Blackboard through the Edit option in the ‘Meatball’ settings.